UltimateData™ provides you with an easy addition options.
User may ADD Category, Sub-Category or Items. It is
important to keep a logical 'TREE' organization to utilize the program
full capabilities.
Add New Category
UltimateData™ provides you with two ways to Add New
Category.
Method 1: Click on the 'Add New
Category' button
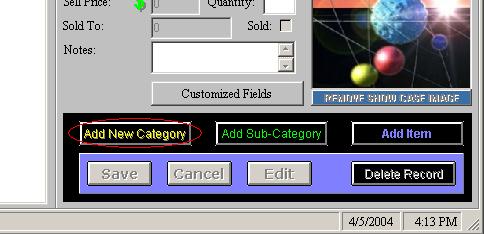
- - Click on the 'Add New
Category' button.
- Choose a representative ICON from the ICON Browser.
- In the flashing 'Category/Item' field Type the Category Name.
- In the 'Description' field type the Category's Description.
-
- You may choose a
'Showcase' image to represent your category. For Example: To represent
'Trains' category you may place a train image by clicking on the:
Showcase button. Select a desired image and click: OPEN.
- The image will be saved
in the program 'Images' folder.
-
-
Please Note: The program protect you from overriding your
image. If you try to select another image with the same name, the
program will not allow this operation!
-
-
-
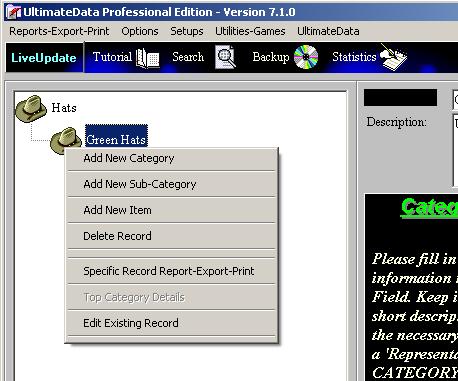
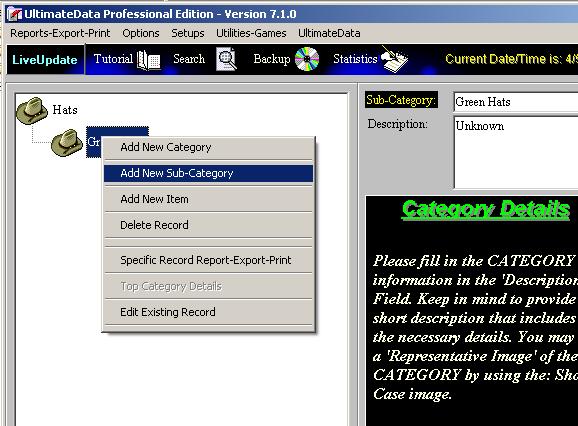
Method 2: Right Click and using the
'Add New Category' pull down menu option
-
-
-
- Right Click on a selected Category. A pull-down menu will
open.
- - Click on the:
'Add New Category' menu option.
- Choose a representative ICON from the ICON Browser.
- In the flashing 'Category/Item' field Type the Category Name.
- In the 'Description' field type the Category's Description.
-
-
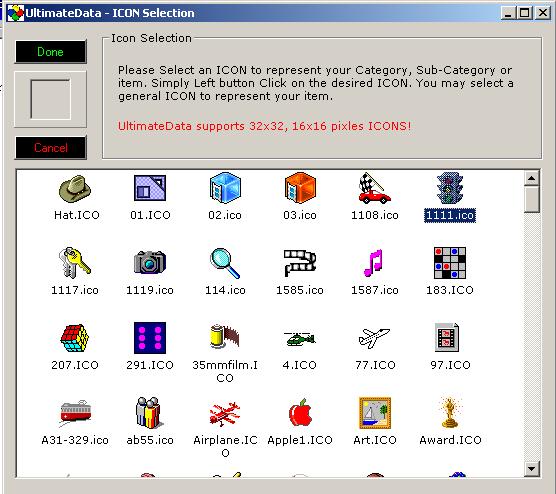
Choosing Representative ICON
Every Category, Sub-Category and Item are represented by an
ICON. UltimateData™ provides you with an easy way to select the desired ICON.
It is recommended to choose an ICON that will represent your Category. For
Example: Train for 'Electric Trains' Category. We also recommend to choose the
same ICON for All Sub-Categories and Items to be opened under this Category.
If you do NOT find a full matching ICON to your Category, Sub Category or
Item we suggest to choose a GENERAL icon for representation.
The ICON Selection window will open every time that you wish to Add Category,
Sub Category or Item.
Selecting an ICON
In the ICON Selection window select an ICON by Left Click on the desired
ICON. Click on the: 'Done' to complete the selection or 'Cancel' to cancel.
To Complete the Addition operation Click on the flashing
'Save' button!

Add New Sub Category
UltimateData™ provides you with
two
similar ways to Add New Sub Category.
Method 1: Click on the 'Add Sub
Category' button
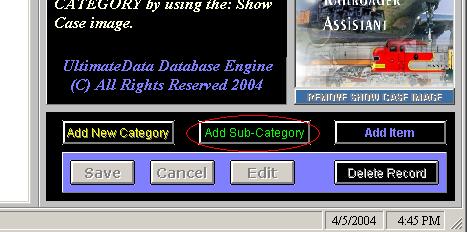
- - Click on the 'Add Sub-Category' button.
- Choose a representative ICON from the ICON Browser.
- In the flashing 'Sub-Category' field Type the Sub-Category Name.
- In the 'Description' field type the Sub-Category's Description.
-
- You may choose a
'Showcase' image to represent your sub-category. For Example: To represent
'Hats' sub-category you may place a hat image by clicking on the:
Showcase button. Select a desired image and click: OPEN.
- The image will be saved
in the program 'Images' folder.
-
-
Please Note: The program protect you from overriding your
image. If you try to select another image with the same name, the
program will not allow this operation!
Method 2: Right Click and using the
'Add Sub Category' pull down menu option
- Right Click on a selected Category or Sub-Category. A pull-down menu will
open.
- Click on the:
'Add New Sub-Category' menu option.
- Choose a representative ICON from the ICON Browser.
- In the flashing 'Sub-Category' field Type the Category Name.
- In the 'Description' field type the Sub-Category's Description.
To Complete the Addition operation Click on the flashing
'Save' button!
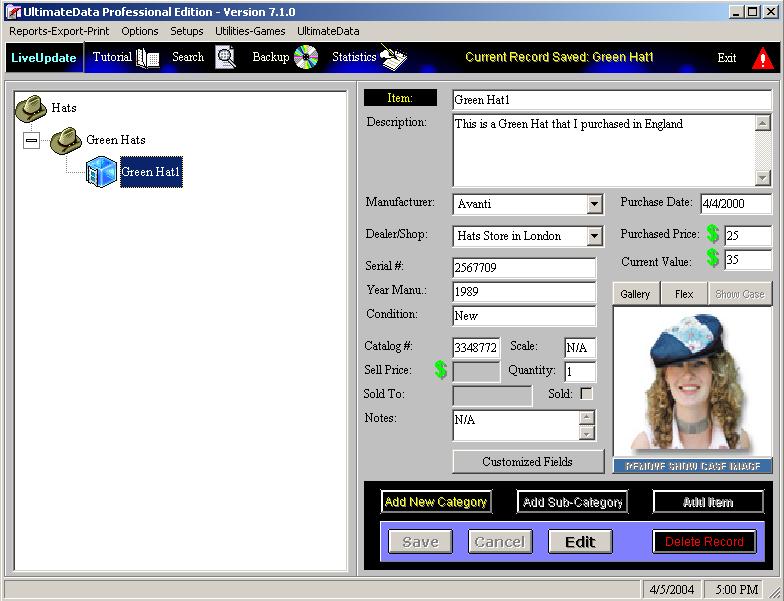
Add an Item
UltimateData™ provides you with a
two similar ways to Add New Item.
Method 1: Click on the 'Add Item' button
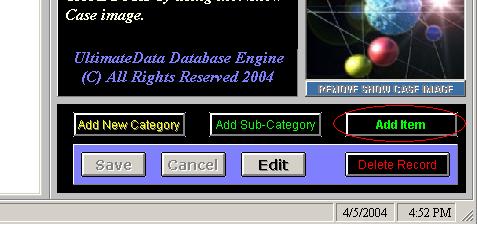
- Click on the 'Add Item' button.
- Choose a representative ICON from the ICON Browser.
- In the flashing 'Item' field Type the Item's Name.
- Fill In the desired Item's fields.
Please Note: You must fill the next fields: 'Purchased Price',
'Current Value' and 'Quantity'. If you do NOT fill these fields the program will
automatically assign the value ZERO (0).
To Complete the Addition operation Click on the flashing
'Save' button!
For
any questions please email us at: info@tayden.com