|
Train Trek Layout Simulation™ Build Your Layout |
|
|
|
|
|
Build Your Layout |
|
|
Train Trek Layout Simulation™ (LS) provides the user with an easy for use layout editor. The editor enables the assembly of ANY SCALE and Manufacturer tracks plan since it is diagrammatically based! In this way there are no limitations to layout types and scales. Any scale can be assembled and simulated. After simulating your layout, you can run it live! The current version supports Marklin Digital system.
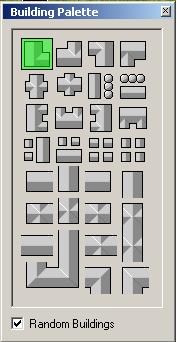
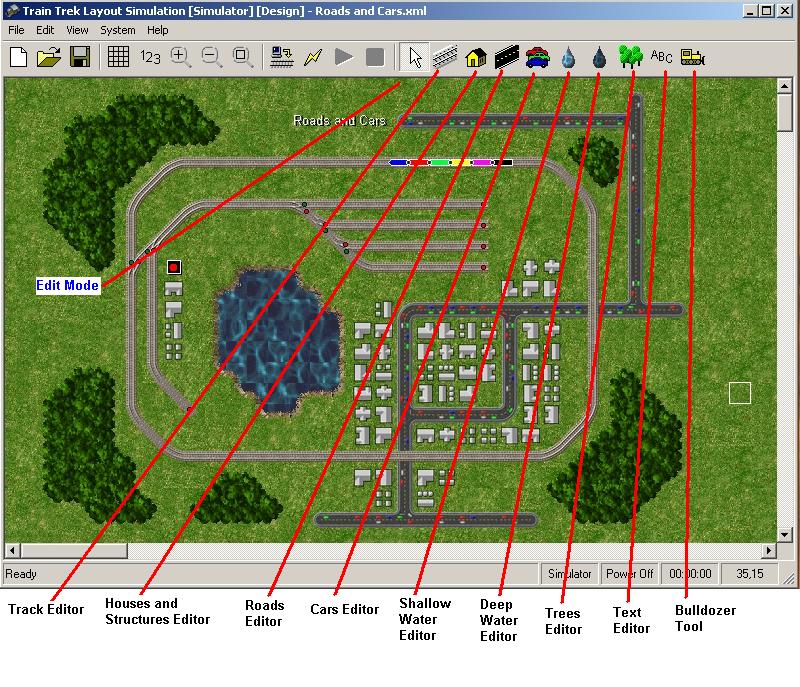
1. Tracks Assembly - Click on the Tracks Editor button. Click and HOLD the left mouse button, dragging it o the screen. It will draw a continues track line. If you cross 2 track lines, the system will automatically create a turnout. We recommend to play with the track editor for some time and understand it's concept. It enables easy way to quickly draw your layout on screen. 2. Houses and structures Editor - This features enables the creation of houses and other structures. You can choose any type of structure to be paint on top of the layout. The system enables the selection of a random structure or individually chosen.
3. Roads Editor - Simply draw roads on top of your layout. 4. Car Editor - Add cars on top of your roads.
4. Shallow Water Editor - Create lakes or part of lakes with shallow water region. It can be combined with deep water region. 5. Deep Water Editor - Create lakes or part of lakes with deep water region. It can be combined with shallow water region. 6. Trees Editor - Create trees. Left Click, hold and draw trees around the layout. 7. Text Editor - This feature is aimed for creating text on the layout. You may name important turnouts, stations or simply place a label where necessary. 8. Bulldozer Tool- This feature enables objects deletion. Simply hold and drag over the objects that you want to delete. (The operation can be un-done by using the UNDO feature)
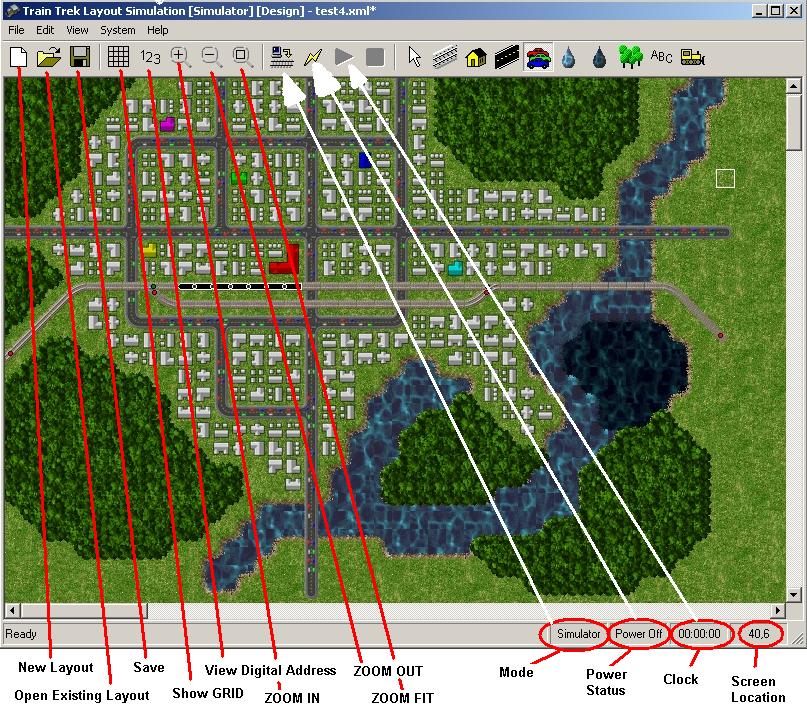
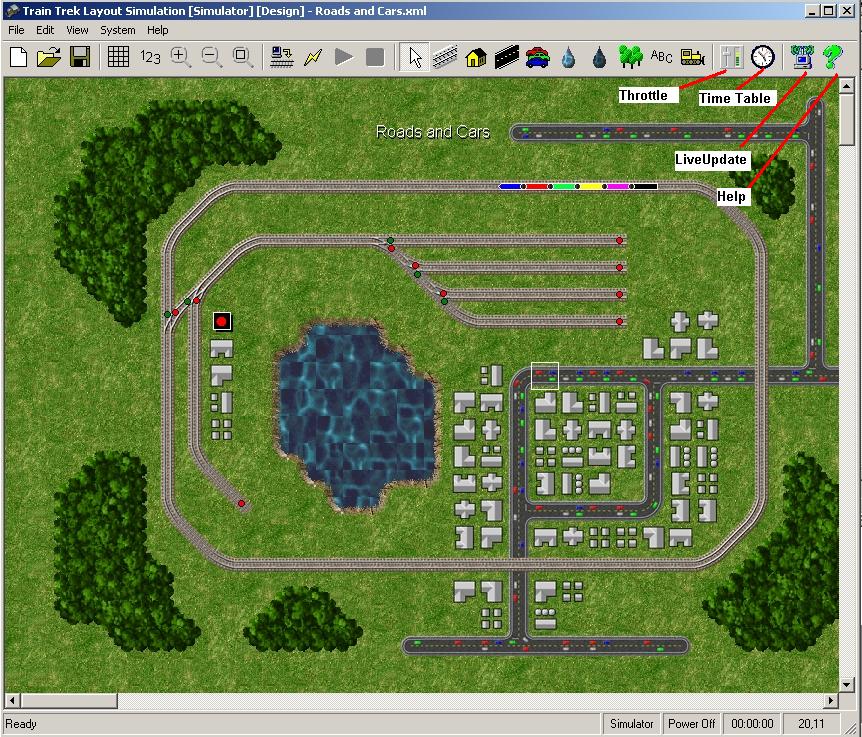
1. Create New Layout - Click on this button to create new layout. 2. Open Existing Layout - Click on this button to open an existing layout. 3. Saving your Layout - Click on this button to save the current layout. 4. View/Hide GRID - Click on this button to VIEW/HIDE the GRID. 5. View/Hide Digital Address - Click on this button to View/Hide components Digital Address. 6. Zoom In - Zoom In. 7. Zoom Out - Zoom Out. 8. Zoom Fit - Zoom Fit. Click on this button to fit the layout in the current screen. 9. Mode Indicator - Here you can see if the system is at: Simulator or Controller mode. Note the upper button. Clicking on the upper button alternately, will switch the system from Simulator to Controller mode and vice versa. In Controller Mode, real trains, turnouts and accessories may be controlled manually and/or automatically. 10. Power Status Indicator - Here you can view the system's power status. Note that the upper button is used to toggle the system's power ON/OFF. In Simulator mode, you HAVE to turn the power ON, in order to start the simulation of entire layout. In Controller mode, the upper button is actually turning the system's power ON/OFF. (Of Marklin Digital System) 11. Clock Indicator- When running the layout automatically, using the Time Table, here you can view the elapsed time. 12. Screen Coordinates - Screen Coordinates. Features 13. Throttle - Click on this button to open the layout's throttle. 14. Time Table - Click here to open the layout's Time Table. 14. LiveUpdate - Click here to open the LiveUpdate utility. If there is a new update, automatically download it from our web site. 14. Help - Click here to open the HELP main page.
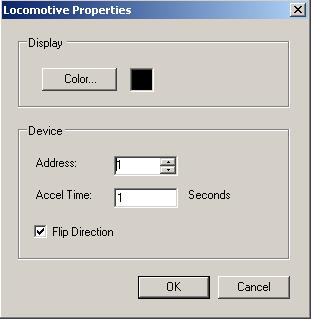
Placing/Removing Trains and Turnouts 1. To Insert a Locomotive - Right Click on any track segment and select: Insert Locomotive. 2. To Insert a Car - Right Click on any track segment and select: Insert Car. 3. To Insert a Sensor - Right Click on any track segment and select: Insert Sensor. 4. To Insert a Label - Right Click anywhere and select: Insert Label. 5. To a Car or Locomotive - Right Click on any Car or Locomotive and select: Delete. (You can also use the Bulldozer tool) Assigning Digital Address to Locomotives, Turnouts and Accessories 1. To assign Digital Address to a Locomotive - Right Click on any Locomotive and select: Properties. You may assign the Locomotive Color, Digital Address, Acceleration Delay (For Momentum) or Flip it's direction on the tracks.
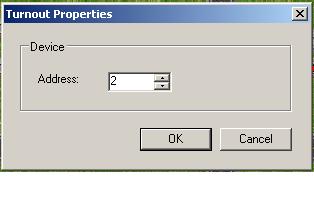
2. To assign Digital Address to a Turnout - Right Click on any Turnout and select: Properties. Assign a Digital Address.
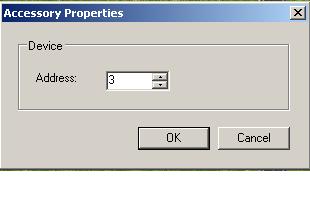
3. To assign Digital Address to an Accessory - Right Click on any Accessory and select: Properties. Assign a Digital Address.
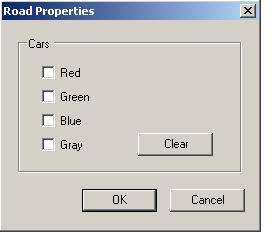
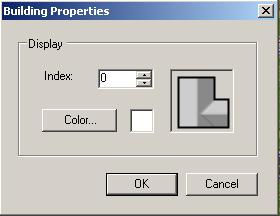
Assigning Properties to Roads and Structures Right Click on Roads or Structure (Houses) in order to change their Properties.
Roads Properties
Structures (Houses) Properties
|
|
| Tayden
Design Technical Publications Copyright © 2010 Tayden Design, Inc. All rights reserved. Revised: April 01, 2010 |
|